
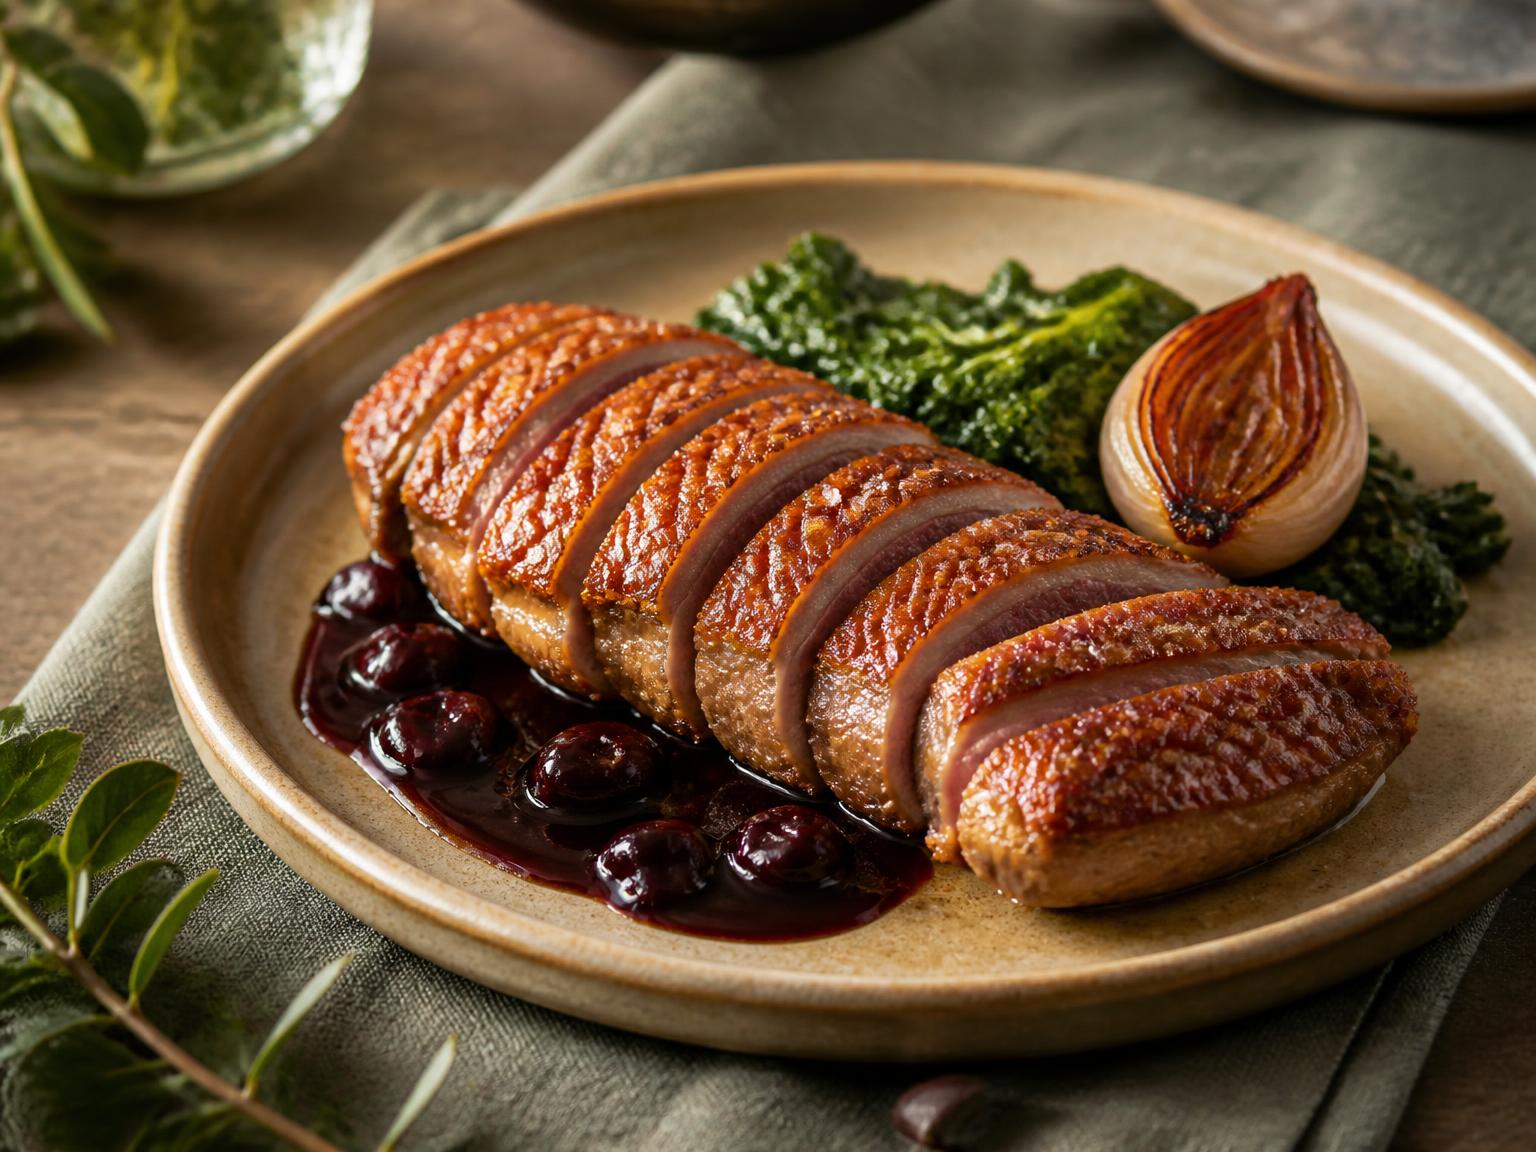
Method basis: established culinary technique and published food-safety guidance. Times are starting ranges for a domestic basket air fryer; the thermometer and the look of the skin decide the finish. Editorial standards
Ingredients
For the duck
- 2 skin-on duck breasts, about 170–250 g (6–9 oz) each
- 1 tsp fine sea salt (or roughly 1% of the breast weight)
- Freshly cracked black pepper, to finish
Cooking for a different number? Scale the quantities rather than guessing — fat and salt do not scale linearly with guest count.
Equipment that matters
Instant-read thermometer
Air fryers vary by basket design, wattage, fan strength and preheat behaviour, so the timings here are starting ranges. A probe reading is the only thing that tells you where the centre actually is.
Sharp, thin-bladed knife
Scoring is a controlled cut through skin and fat only. A dull blade drags into the meat, which leaks juice into a basket you cannot deglaze.
Tongs and a heatproof container
Rendered fat pools under the basket while it is still dangerously hot. You want to move breasts with tongs and pour fat into something that will not soften or tip.
Before you start
Dry the skin, then salt it
Pat the skin bone-dry with paper towel and salt it. Surface moisture has to boil off before browning starts, and in an air fryer that steam has nowhere useful to go. If you have a few hours, salt the skin and leave the breasts uncovered on a rack in the fridge — a drier surface browns sooner, which shortens the time the meat spends heating up.
Score the fat cap, shallowly
Cut a 1 cm (⅜ in) crosshatch or parallel lines through skin and fat, stopping short of the meat. If the knife shows red you have gone too deep, and the cut will leak. The channels matter more here than in a pan: draining is the only way fat leaves an air fryer basket.
Skip the preheat, and check your manual
A cold start buys the fat cap a few extra minutes of gentle rendering before the meat climbs, which is the whole difficulty of this cook. If your machine's instructions require a preheat, preheat at the lowest setting it allows and expect the render stage to run shorter. Do not add water to the drawer unless the manufacturer explicitly permits it.
Cook two at most, with air between them
Duck breast needs airflow on all sides and room for fat to drain. Two breasts in a standard basket, not touching, is the practical limit for most machines; a crowded basket steams instead of browning and the two pieces finish at different times.
Method, step by step
Set the breasts skin-side up
Lay the breasts in the basket skin-side up, not touching, and do not oil them. Skin-side up puts the fan directly on the surface you want dry and brown, and lets melted fat run down and away rather than sitting under the skin.
Watch for Any part of a breast touching the basket wall will brown differently. Give each piece a clear gap before you start.
Render low: 300–325°F (150–160°C) for 8–12 minutes
Run the low stage until the fat cap has visibly thinned, the skin has shrunk back and the surface has gone from pale and slack to matte, tacky and faintly golden. This is the stage that decides the result; rushing it is the single most common reason air-fried duck skin stays rubbery.
Watch for Fat should render steadily without spitting or smoking. Heavy smoke at this point means the setting is too high — drop it and add time.
Pause and drain the fat
Open the basket, lift the breasts onto a plate with tongs, and tip the collected fat into a heatproof container. Standing fat is what smokes, spits and eventually flares; draining it once mid-cook removes most of that risk. Let the fat cool before you cover or move it, and never pour hot fat into a sink or a thin plastic tub.
Watch for If the drawer is close to full at this point, drain it again before the crisping stage rather than after.
Crisp high: 390–400°F (200–205°C) for 3–6 minutes
Return the breasts skin-side up and raise the setting. This short window is where the crust forms. Check at three minutes and then every minute or so — the difference between deep amber and burnt is about ninety seconds at this temperature, and the meat is climbing fast now.
Watch for Pull the basket early if the thinnest edges darken ahead of the centre; those edges will keep browning on residual heat.
Measure, don't guess
Probe from the side into the thickest part, keeping the tip in the middle of the muscle and clear of the fat layer. Pull at 130–135°F (54–57°C) for rosy or 140–145°F (60–63°C) for medium. If the skin is not where you want it but the centre is close, stop cooking: the crust cannot be recovered from an overcooked breast, and a short pass under a hot grill afterwards is the safer trade.
Watch for The safe minimum for all poultry, duck included, is 165°F (73.9°C). Cooking to a lower temperature is a widespread culinary practice, not a food-safety recommendation.
Rest 5–10 minutes, skin-side up
Rest on a rack, uncovered, skin-side up. Carryover adds roughly 3–5°F, and resting on a plate or under foil traps steam against the crust you just built. Slice across the grain at a slight angle and season with pepper and flaky salt at the table.
Watch for A crust that softens during the rest was never fully rendered — extend the low stage next time rather than the high one.
Temperatures and timings
| Breast | Low render stage | High crisp stage | Pull at |
|---|---|---|---|
| Small, 170–190 g / thin fat cap | 300–325°F (150–160°C), 8–9 min | 390–400°F (200–205°C), 3–4 min | 130–135°F (54–57°C) for rosy |
| Medium, 190–220 g | 300–325°F (150–160°C), 10–12 min | 390–400°F (200–205°C), 4–5 min | 130–135°F (54–57°C) for rosy |
| Large, 220–250 g / thick fat cap | 300–325°F (150–160°C), 12–14 min | 390–400°F (200–205°C), 5–6 min | 130–135°F (54–57°C) for rosy |
| Cooked through | As above | As above | 165°F (73.9°C), the safe minimum for poultry |
Quack Fix
The four ways this recipe usually goes wrong, what to do about it mid-cook, and how to stop it happening again.
Skin is pale and rubbery when the meat is done
- Likely cause
- The low render stage was too short, so fat was still under the skin when the meat hit temperature.
- Fix now
- Slice the breast, then crisp the skin side alone for a minute or two under a hot grill or in a dry pan. Do not put a cooked breast back into a 400°F basket.
- Prevent next time
- Judge the low stage by the fat cap, not the clock — matte, shrunken, faintly golden before you raise the heat.
Meat overcooked before the skin crisped
- Likely cause
- Too much time at the high setting, or a machine that runs hotter than its dial.
- Fix now
- Nothing recovers a grey breast. Slice thin, across the grain, and serve with something sharp.
- Prevent next time
- Start probing at the beginning of the crisping stage and accept a lighter crust when the centre reaches your target.
The kitchen fills with smoke
- Likely cause
- Fat pooling in the drawer and hitting its smoke point, usually late in the cook.
- Fix now
- Stop the machine, let it settle for a moment, then drain the fat with tongs and a heatproof container before continuing.
- Prevent next time
- Drain between stages as a matter of course, and keep the render stage at or below 325°F (160°C). Add water to the drawer only if the manufacturer says you may.
Skin sticks to the basket
- Likely cause
- The breast was started skin-side down, or moved before the surface had set.
- Fix now
- Slide a thin spatula under the whole piece rather than pulling with tongs, and lift it flat.
- Prevent next time
- Cook skin-side up throughout, and leave the breasts alone during the low stage.
Browning is uneven across one breast
- Likely cause
- Fan hot spots, a curling breast, or a piece too close to the basket wall.
- Fix now
- Rotate the breast 180° at the halfway point of the crisping stage.
- Prevent next time
- Leave a clear gap around each piece, and press a curling breast flat with a spatula early in the low stage.
Fat spatters up onto the element or the food
- Likely cause
- A deep pool of hot fat plus high fan speed.
- Fix now
- Pause, drain, and wipe the inside of the lid or shield once the machine has cooled. Do not throw liquid at hot fat.
- Prevent next time
- Drain mid-cook, and do not run the high stage with a full drawer.
Two breasts finish minutes apart
- Likely cause
- Different weights or thicknesses, or unequal airflow in the basket.
- Fix now
- Pull the smaller one when it reaches temperature and let it rest while the larger finishes.
- Prevent next time
- Buy breasts of a similar weight where you can, probe each one separately, and never treat one reading as covering both.
Skillet versus air fryer
Neither method is the better one in general. The air fryer trades crust control and a pan sauce for a hands-off cook and a contained mess; a skillet trades attention and spatter for a crust you can steer minute by minute.
Attention needed
- Air fryer
- Two settings and one drain; the basket does the rest.
- Skillet
- Continuous — you manage heat and pour off fat as it renders.
Crust control
- Air fryer
- Air browning, so the crust forms in patches and is harder to steer.
- Skillet
- Direct metal contact over the whole fat cap, adjustable minute by minute.
Fat management
- Air fryer
- Fat drains into the drawer and needs draining once mid-cook.
- Skillet
- Fat sits in the pan and is poured off repeatedly.
Sauce
- Air fryer
- No fond to deglaze; sauces have to be made separately.
- Skillet
- A pan sauce comes free with the cook.
Predictability
- Air fryer
- Times shift materially between machines, so probe earlier than you think.
- Skillet
- More repeatable once you know your pan and burner.
Mess and smell
- Air fryer
- Mostly contained in the basket and drawer.
- Skillet
- Open spatter and more smoke in the room.
Cooking duck tonight? Don't guess.
If you want skin that shatters and a breast you can call at the right temperature, the playbook is the short version: scoring depth, cold-pan rendering, and the numbers to pull at. Tell us what you're cooking in the Duck Game Plan and we'll build your temperature, timing, crispy-skin and serving plan. Subscribers also get Duck the Fundamentals, the printable 28-page playbook, a short welcome series, and occasional DeliciousDuck recipes and guides.
- Scoring depth and cold-pan rendering, step by step
- Pull temperatures and carryover for breast, with a rest plan
- Why skin turns leathery, and the two fixes that work
- A printable kitchen card with temperatures and timings
You can also read our companion article, the Duck Cooking Starter Guide, plus the temperature and doneness guide and the calculators, right now.
Waste nothing from the basket
The fat is the second reason to cook duck breast, and an air fryer collects it in one place for you.
Fat from the drawer
Strain it once cool and refrigerate it — how much you get depends on the size and breed of the breast.
Ways to use duck fatCold cooked breast
Slice thin the next day for sandwiches or a warm salad. Refrigerate within two hours and use within 3–4 days.
Trimmed skin and edges
Render them slowly into cracklings while the breasts rest; salt while hot.
Common questions
- Should I preheat the air fryer for duck breast?
- Not if your machine allows a cold start. Starting cold gives the fat cap a few extra minutes of gentle rendering before the meat climbs, which is the hardest part of this cook to get right. If the manufacturer's instructions require preheating, preheat at the lowest setting available and expect the low stage to run shorter.
- Skin-side up or skin-side down?
- Skin-side up throughout. The fan works on the top surface, so skin-side up dries and browns the skin while melted fat drains away from it. Skin-side down puts the skin in the fat that has just left it, and it tends to stick to the basket.
- Is an air fryer better than a skillet for duck breast?
- It is different, not better. The air fryer is more hands-off, contains most of the mess and needs no fat management beyond draining. A skillet gives you direct contact browning, continuous control of the render, and a pan you can build a sauce in. If crust quality is the priority, the skillet still has the advantage.
- Can I put water in the drawer to stop the smoke?
- Only if your manufacturer explicitly permits it — many do not, and water meeting hot fat or a heating element is a real hazard. Draining the rendered fat between stages solves the same problem without that risk.
- How long does air fryer duck breast take?
- Roughly 12–20 minutes of cooking for most breasts, split between a low render stage and a short high-heat stage, plus a 5–10 minute rest. Treat that as a starting range: basket design, wattage, fan strength, breast size and starting temperature all move it, which is why the finish is decided by a thermometer.
- Can I cook duck breast from frozen in an air fryer?
- Thaw it in the refrigerator first. A frozen breast releases water as it cooks, which stops the skin from browning, and the outside overcooks long before the centre is where you want it.
- Do I need to add oil?
- No. Skin-on duck breast releases plenty of its own fat, and added oil only increases what pools in the drawer — which is what smokes and spatters.
Related guides
The technique guides and calculators behind this recipe.
- How to Cook Duck BreastThe cold-pan method, why it works, and how to rescue it when it doesn't.
- How to Score Duck BreastDepth, pattern and knife control — the 90 seconds that decide your skin.
- Duck Breast Temperature & DonenessWhat the numbers mean, and where safety guidance and kitchen practice differ.
- Why Duck Skin Won't CrispSeven symptoms, seven causes, and the fix you can still apply mid-cook.
- Best Sauces for Duck BreastFive sauce families, and which cooking method each one flatters.
- What to Serve With Duck BreastA side-dish matrix built from your sauce, your season and your occasion.
- Interactive Duck Doneness GuideTargets, probe placement and carryover by cut and method.
- Pan-Seared Duck BreastScore, render cold, and finish hot for shatteringly crisp skin over a rosy, evenly cooked centre.
- Duck Fat Roasted PotatoesParboiled, roughed up, and roasted in preheated duck fat until the outsides shatter and the insides stay fluffy.
- Oven-Roasted Duck BreastDuck breast rendered in a skillet and finished in the oven — the steadier route to crisp skin and an even rosy centre when you are cooking four or more.
References
- Safe Minimum Internal Temperature Chart — USDA Food Safety and Inspection ServiceAll poultry, including duck and duck pieces, is listed at a 165°F (73.9°C) safe minimum internal temperature.Reference checked 2026-08
- Duck and Goose from Farm to Table — USDA Food Safety and Inspection ServiceHandling, labelling, storage and cooking guidance specific to duck and goose.Reference checked 2026-08
- Leftovers and Food Safety — USDA Food Safety and Inspection ServiceCooked poultry keeps 3–4 days refrigerated; reheat to 165°F.Reference checked 2026-08