
Short answer
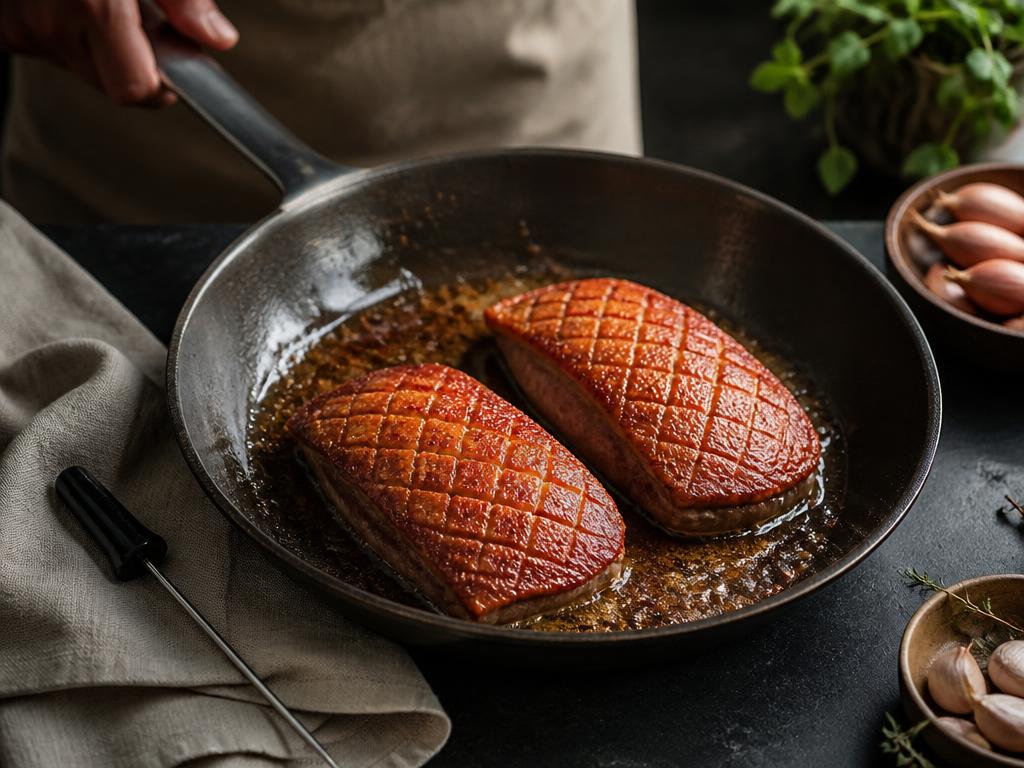
Score the fat cap, put the breasts skin-side down in a cold, dry, unoiled pan, and only then turn the heat to low. Render for 12–18 minutes until the skin is thin, deep gold and crisp, then flip briefly to finish. Pull the breast at 130–135°F (54–57°C) in the centre for a rosy medium-rare and rest it five minutes, or cook to 165°F (74°C) for the official poultry safety minimum.
Method basis: established culinary technique and published food-safety guidance. Cook to the stated internal temperatures rather than to the clock. Editorial standards
Ingredients
For the duck
- 2 skin-on duck breasts, about 170–250 g (6–9 oz) each
- 1 tsp fine sea salt (or roughly 1% of the breast weight)
- Freshly cracked black pepper, to finish
Optional pan sauce
- 1 small shallot, finely diced
- 60 ml (¼ cup) dry red wine, port, or cherry juice
- 120 ml (½ cup) chicken or duck stock
- 1 tsp red wine vinegar
- 15 g (1 tbsp) cold unsalted butter
Cooking for a different number? Scale the quantities rather than guessing — fat and salt do not scale linearly with guest count.
Equipment that matters
Instant-read thermometer
The window between rosy and grey on a duck breast is a few degrees wide. Colour and touch are not reliable substitutes.
Thermometer buying guideHeavy skillet, 10–12 in
Cast iron or thick stainless holds a steady low temperature through a long render and browns evenly at the finish.
Pan buying guideSharp, thin-bladed knife
Scoring is a controlled cut through skin and fat only. A dull blade drags into the meat and lets juices leak during the render.
Knife buying guide
Before you start
Temper and dry the skin
Take the breasts out of the fridge 20–30 minutes ahead and pat the skin bone-dry with paper towel. Surface moisture has to boil off before rendering begins, and every minute spent evaporating water is a minute the meat is cooking without the skin crisping. If you have time, salt the skin and leave the breasts uncovered in the fridge for a few hours — a drier surface renders faster.
Score the fat cap
Cut a 1 cm (⅜ in) crosshatch or parallel lines through the skin and fat, stopping just short of the meat. The cuts open channels for fat to escape and multiply the surface area that can brown. If the knife hits red, you have gone too deep.
Pick the pan, and know how it behaves
Stainless and cast iron both work, differently. Stainless answers the burner fast, so you can back off the moment the render gets loud, and its fond makes the better pan sauce. Cast iron holds a steady low heat and browns hard at the finish, but it lags when you turn the heat down. Either way, start dry and unoiled: skin sticking to stainless almost always means the pan was hot before the duck went in.
Method, step by step
Start cold and dry
Lay the breasts skin-side down in an unheated, unoiled pan and only then turn the heat to low. There is enough fat in the skin to fry the breast in itself; adding oil just delays the render.
Watch for Silence for the first minute or two is normal. A loud sizzle immediately means the pan was already hot.
Render slowly for 12–18 minutes
Keep the heat low enough that the fat bubbles gently rather than spits. Pour off the liquid fat into a heatproof bowl every few minutes — a shallow pan browns; a deep pool of fat effectively deep-fries and steams. The skin should shrink, flatten and turn a deep, even amber.
Watch for If the skin darkens fast while the fat cap is still thick, drop the heat further and extend the render.
Press if the breast curls
Duck breasts contract as connective tissue tightens and can lift at the edges, leaving pale patches. Press gently with a spatula for the first few minutes, or set a small weight on top, so the full skin surface stays in contact with the pan.
Flip and finish
Once the skin is crisp and the fat cap is thin, raise the heat slightly and flip. The meat side only needs 1–3 minutes depending on thickness — it is nearly cooked already from the long render.
Watch for Probe from the side into the thickest part, keeping the tip in the centre of the muscle.
Pull early, then rest
Pull at 130–135°F (54–57°C) for rosy, 140–145°F (60–63°C) for medium. Rest skin-side up on a rack for 5–10 minutes; carryover adds roughly 3–5°F, and resting on a plate steams the crust you just spent twenty minutes building.
Watch for The safe minimum for all poultry, duck included, is 165°F (73.9°C). Cooking to a lower temperature is a common culinary practice, not a food-safety recommendation.
Optional: build a pan sauce while it rests
Pour off all but a teaspoon of fat, soften the shallot, deglaze with wine or juice, reduce by half, add stock and reduce again until it coats a spoon. Off the heat, whisk in vinegar and cold butter. Slice the breast across the grain at a slight angle and spoon the sauce under, not over, the skin.
Temperatures and timings
| Result | Pull temperature | After rest |
|---|---|---|
| Rare | 125–128°F (52–53°C) | ≈130°F (54°C) |
| Medium-rare (most common) | 130–135°F (54–57°C) | ≈135–138°F (57–59°C) |
| Medium | 140–145°F (60–63°C) | ≈145–150°F (63–66°C) |
| USDA recommendation | 165°F (73.9°C) | Fully cooked through |
Quack Fix
The four ways this recipe usually goes wrong, what to do about it mid-cook, and how to stop it happening again.
Skin is soft and rubbery, not crisp
- Likely cause
- The render was too short or too hot, leaving fat under the skin.
- Fix now
- Return the breast skin-side down to a low pan for another 3–5 minutes, pouring off fat as it releases.
- Prevent next time
- Treat the render as the recipe, not the preamble: 12–18 minutes on low with regular fat removal.
Skin browned fast but the fat cap is still thick
- Likely cause
- Heat was too high — the surface set before the fat could melt out.
- Fix now
- Lower the heat and continue; a slightly darker crust is better than an unrendered one.
- Prevent next time
- Start in a cold pan and never let the fat spit.
Grey band under the skin
- Likely cause
- Prolonged high heat drove overcooking inward from the surface.
- Fix now
- Nothing to be done after the fact — slice thinly and serve with a sharp sauce.
- Prevent next time
- Low heat for the render, brief high heat only at the flip.
Meat is tough and dry
- Likely cause
- Overcooked past medium, or sliced with the grain.
- Fix now
- Slice thinner, across the grain, and serve with pan juices.
- Prevent next time
- Pull by thermometer, rest 5–10 minutes, and carve at an angle.
Use the Whole Duck
Nothing here needs to go in the bin. Each of these is worth more than the packaging suggests.
Rendered fat
Strain through a fine sieve and refrigerate. It is the single best roasting fat in the kitchen.
Fifteen uses for duck fatTrimmed skin edges
Dice and fry slowly into cracklings; salt while hot and scatter over salad.
Cold cooked breast
Slice thin the next day for sandwiches or a warm salad — do not reheat it hard.
Shop this guide
Where to source what this recipe needs.
Buying duck breast
Breast weights vary widely between suppliers, so render to the look of the fat cap and check temperature rather than following a fixed time. The cut-specific guide covers formats, weights, and what to check when the box arrives.
Where to buy duck breast online
Want the same result without an open pan spitting fat across the hob? The tradeoffs are real, and they are laid out in Air fryer duck breast
Common questions
- Do I need to add oil to the pan?
- No. Skin-on duck breast renders more than enough of its own fat. Added oil raises the fat level early, which fries the skin before it has rendered.
- Can I cook duck breast from frozen?
- Thaw it first. A frozen breast cooks unevenly and releases water into the pan, which stops the skin from crisping. Thaw in the fridge for 24 hours.
- Is pink duck breast safe?
- The safe minimum for all poultry, duck included, is 165°F (73.9°C). Serving duck breast rosy is a widespread restaurant and home practice, but it is a culinary choice rather than a food-safety recommendation. Anyone pregnant, elderly, very young, or immunocompromised should cook to the full 165°F.
- Can I cook duck breast in a stainless steel pan?
- Yes, and it is a good choice. Start it in a cold, dry stainless pan exactly as you would in cast iron — the skin releases its own fat within a couple of minutes and stops sticking. Stainless reacts faster to heat changes, so go by the sizzle; cast iron is steadier but slower to respond.
- Should I score in a crosshatch or in lines?
- Either works. Crosshatch gives slightly more surface area and drainage; parallel lines are easier to keep shallow. Depth matters far more than pattern.
Related guides
The technique guides and calculators behind this recipe.
- How to Cook Duck BreastThe cold-pan method, why it works, and how to rescue it when it doesn't.
- How to Score Duck BreastDepth, pattern and knife control — the 90 seconds that decide your skin.
- Duck Breast Temperature & DonenessWhat the numbers mean, and where safety guidance and kitchen practice differ.
- Why Duck Skin Won't CrispSeven symptoms, seven causes, and the fix you can still apply mid-cook.
- Best Sauces for Duck BreastFive sauce families, and which cooking method each one flatters.
- What to Serve With Duck BreastA side-dish matrix built from your sauce, your season and your occasion.
- Interactive Duck Doneness GuideTargets, probe placement and carryover by cut and method.
- Recipe ScalerScale any ingredient list from its original servings to yours.
- Air Fryer Duck BreastAir fryer duck breast with crisp skin: render the fat gently, finish at high heat, and use a thermometer while managing smoke and hot rendered fat.
- Duck à l’OrangeA whole duck roasted in two stages, served with a bitter-orange gastrique built from the pan drippings — sharp and glossy rather than sweet.
- Oven-Roasted Duck BreastDuck breast rendered in a skillet and finished in the oven — the steadier route to crisp skin and an even rosy centre when you are cooking four or more.
- Best Pan for Duck BreastThermal mass versus control, and which one your method needs.
- Best Thermometer for DuckInstant-read or leave-in? Match the tool to how you cook duck.
- Best Knife for Scoring DuckTip control beats prestige — four blade shapes, honestly compared.
References
- Safe Minimum Internal Temperature Chart — USDA Food Safety and Inspection ServiceAll poultry, including duck and duck pieces, is listed at a 165°F (73.9°C) safe minimum internal temperature.Reference checked 2026-08
- Duck and Goose from Farm to Table — USDA Food Safety and Inspection ServiceHandling, labelling, storage and cooking guidance specific to duck and goose.Reference checked 2026-08